How to display data on Table Control
How to display data on Table Control – SAP Module Pool Programming
Description About the Development: In this article, we will know about how to display data on table control step by step. First, we will create an input screen where users can input data, and based on input records will be displayed on the Table Control. There is a Convert Document Button using this button we can convert the status of each record(P -> C or C -> P vice versa). Using the Back button we will move one step back. Let’s create How to display data on Table Control…
Input and Output of the Program:
Input Screen:

Output Screen:

Best Gaming Laptop Under 1 Lakh
Prerequisite: To complete this development, we will create objects one by one and we will learn here step by step in this article.
Start now…Create these four objects one by one.
- Custom Table: Using SE11
- Program: Using SE38
- Screen Painter or Module Pool Program: Using SE38 or SE51
- Transaction Code: Using SE38 or SE93
Highest Paying Jobs – Merchant Navy Salary after 12th
First, we will create a custom Table.
Step 1. Go to the SE11 Transaction Code (First type SE11 in the command bar as per the screenshots).

Step 2. Enter your table name start with Z or Y and click on Create button.
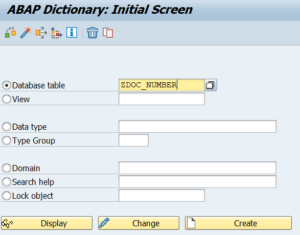
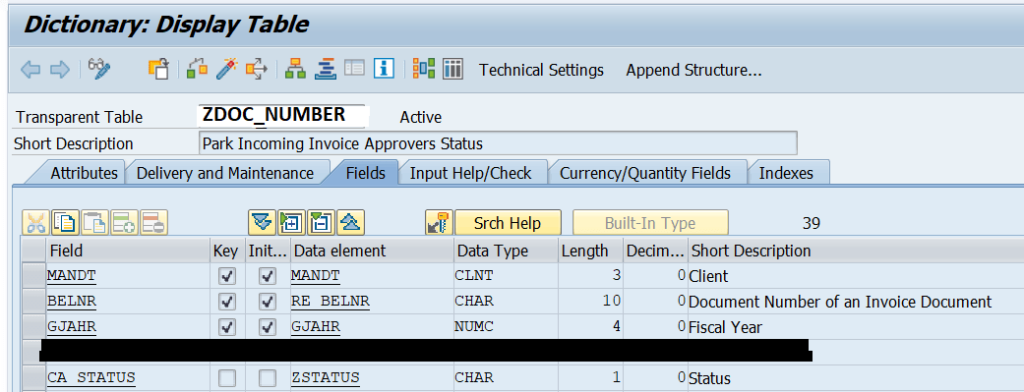
Step 3. Create these three fields name BELNR, GJAHR, and STATUS.
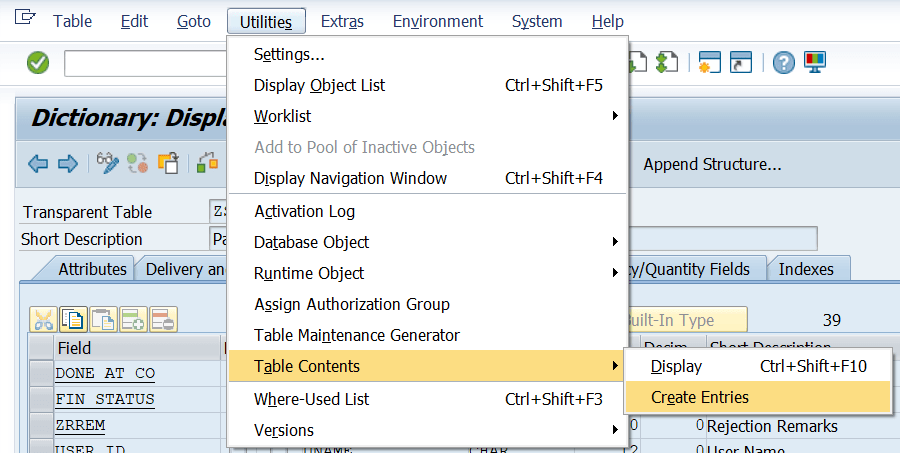
Step 4. Create some entries/records in this table. Goto the Menu Utilities-> Table Contents-> Create Entries
Step 5. Enter the details and click on the SAVE button.
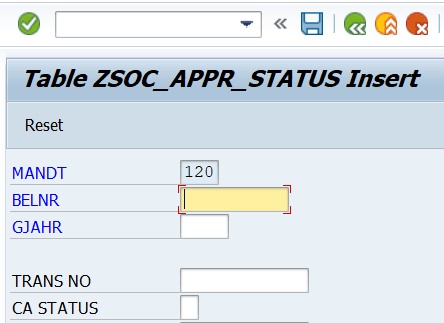
After saving the details which you have entered, we can make an operation on this table in the program.
Now, we will create a program
Step 1. Create a program using SE38 to write the logic and fetch the data from a custom table and display it on the screen.
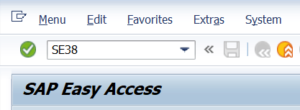
Press Enter
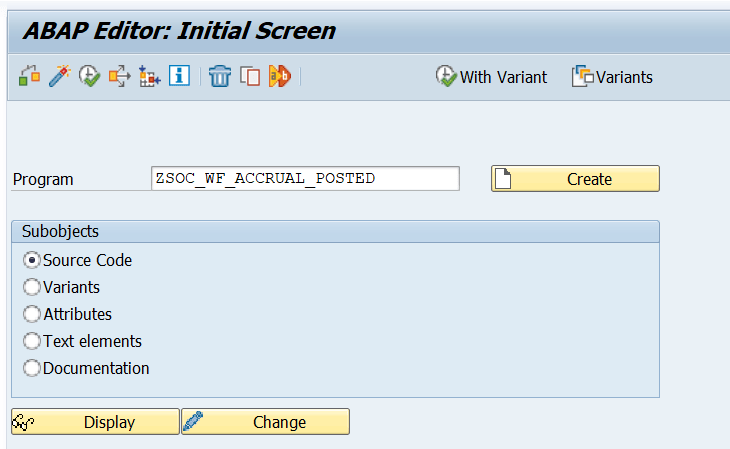
Step 2. Enter a program name and click on Create button.
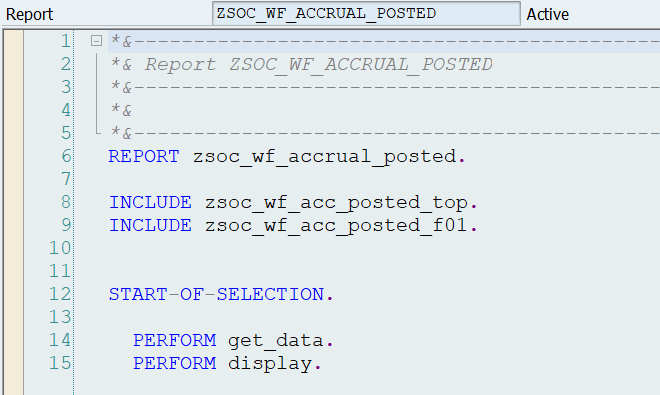
Step 3. The program editor will be opened and here you have to write this code.
Double click on the Top include(first Include) program and paste this logic (as mentioned below).
————————————————-Coding Part—————————————————–
*&———————————————————————*
*& Include ZSOC_WF_ACC_POSTED_TOP
*& Data Declaration Part
*&———————————————————————*
TABLES: rbkp.
CONTROLS: TC_DATA TYPE TABLEVIEW USING SCREEN 9001.
TYPES: BEGIN OF ty_final,
mark TYPE char1,
belnr TYPE rbkp-belnr,
gjahr TYPE rbkp-gjahr,
xblnr TYPE rbkp-xblnr,
usnam TYPE rbkp-usnam,
status TYPE char1,
END OF ty_final.
DATA: gt_final TYPE STANDARD TABLE OF ty_final,
gs_final TYPE ty_final,
mark TYPE char1,
status TYPE char7,
gs_ZDOC_NUMBER TYPE ZDOC_NUMBER,
gt_ZDOC_NUMBER TYPE TABLE OF ZDOC_NUMBER,
in_tot_rec TYPE char40.
*&———————————————————————*
*& Selection Screen or Input Screen Coding
*&———————————————————————*
SELECTION-SCREEN BEGIN OF BLOCK b1 WITH FRAME TITLE TEXT-001.
SELECT-OPTIONS: so_belnr FOR rbkp-belnr,
so_gjahr FOR rbkp-gjahr NO-EXTENSION NO INTERVALS No-DISPLAY,
so_usnam FOR rbkp-usnam NO INTERVALS DEFAULT sy-uname,
so_stat FOR mark NO INTERVALS OBLIGATORY DEFAULT ‘P’.
SELECTION-SCREEN END OF BLOCK b1.
AT SELECTION-SCREEN ON VALUE-REQUEST FOR so_stat-low.
PERFORM get_value USING ‘SO_STAT-LOW’.
Next, double click on second include program (F01) and paste this logic (as mentioned below)
*&———————————————————————*
*& Include ZSOC_WF_ACC_POSTED_F01
*&———————————————————————*
*&———————————————————————*
*& Form GET_DATA
*&———————————————————————*
*& text
*&———————————————————————*
*& –> p1 text
*& <– p2 text
*&———————————————————————*
FORM get_data .
DATA: lv_cnt TYPE char3.
SELECT * FROM ZDOC_NUMBER INTO TABLE gt_ZDOC_NUMBER
WHERE belnr IN so_belnr AND gjahr IN so_gjahr AND done_by_co IN so_usnam AND fin_status IN so_stat.”IN (‘P’, ‘C’).
LOOP AT gt_ZDOC_NUMBER INTO gs_ZDOC_NUMBER.
gs_final-belnr = gs_ZDOC_NUMBER-belnr.
gs_final-gjahr = gs_ZDOC_NUMBER-gjahr.
gs_final-usnam = gs_ZDOC_NUMBER-done_by_co.
gs_final-status = gs_ZDOC_NUMBER-fin_status.
APPEND gs_final TO gt_final.
CLEAR gs_final.
ENDLOOP.
DESCRIBE TABLE gt_final LINES lv_cnt.
CONDENSE lv_cnt.
CONCATENATE ‘Total’ lv_cnt ‘Record(s)’ INTO in_tot_rec SEPARATED BY space.
SORT gt_final BY belnr.
IF gt_final IS NOT INITIAL.
CALL SCREEN ‘9001’.
ELSE.
MESSAGE ‘Data Not Found’ TYPE ‘S’ DISPLAY LIKE ‘E’.
ENDIF.
ENDFORM.
*&———————————————————————*
*& Form DISPLAY
*&———————————————————————*
*& text
*&———————————————————————*
*& –> p1 text
*& <– p2 text
*&———————————————————————*
FORM display .
ENDFORM.
*&———————————————————————*
*& Module USER_COMMAND_9001 INPUT
*&———————————————————————*
* text
*———————————————————————-*
MODULE user_command_9001 INPUT.
DATA: lv_ucomm TYPE sy-ucomm,
lv_line TYPE i.
CLEAR: lv_line.
GET CURSOR LINE lv_line.
lv_ucomm = sy-ucomm.
CASE lv_ucomm.
WHEN ‘BACK’.
LEAVE TO SCREEN 0.
WHEN ‘BTN_CONVERT’.
PERFORM doc_converion.
WHEN OTHERS.
ENDCASE.
CLEAR: lv_ucomm, sy-ucomm.
ENDMODULE.
*&———————————————————————*
*& Module STATUS_9001 OUTPUT
*&———————————————————————*
*&
*&———————————————————————*
MODULE status_9001 OUTPUT.
SET PF-STATUS ‘WF_ACC_POST’.
SET TITLEBAR ‘WF_ACC_TITLE’.
ENDMODULE.
FORM get_value USING pu_field.
TYPES: BEGIN OF ty_value,
status TYPE char1,
desc TYPE char10,
END OF ty_value.
DATA:lt_value TYPE TABLE OF ty_value,
ls_value TYPE ty_value.
CLEAR lt_value[].
ls_value-status = ‘P’.
ls_value-desc = ‘P Posted’.
APPEND ls_value TO lt_value.
CLEAR ls_value.
ls_value-status = ‘C’.
ls_value-desc = ‘C Accrual’.
APPEND ls_value TO lt_value.
CLEAR ls_value.
CALL FUNCTION ‘F4IF_INT_TABLE_VALUE_REQUEST’
EXPORTING
retfield = ‘DESC’
dynpprog = sy-cprog
dynpnr = sy-dynnr
dynprofield = pu_field
value_org = ‘S’
* display = ‘F’ “F = Force
TABLES
value_tab = lt_value[].
IF sy-subrc NE 0.
RETURN.
ENDIF.
ENDFORM.
*&———————————————————————*
*& Form DOC_CONVERION
*&———————————————————————*
*& text
*&———————————————————————*
*& –> p1 text
*& <– p2 text
*&———————————————————————*
FORM doc_converion .
DATA: lv_flag TYPE char1,
lv_msg(50) TYPE c.
READ TABLE gt_final TRANSPORTING NO FIELDS WITH KEY mark = ‘X’.
IF sy-subrc NE 0.
MESSAGE ‘Please Select Document No.’ TYPE ‘W’ DISPLAY LIKE ‘E’.
EXIT.
ENDIF.
IF so_stat-low IS NOT INITIAL.
IF so_stat-low = ‘P’.
so_stat-low = ‘C’.
ELSEIF so_stat-low = ‘C’.
so_stat-low = ‘P’.
ENDIF.
ELSE.
MESSAGE ‘Please Select Document Status’ TYPE ‘W’ DISPLAY LIKE ‘E’.
ENDIF.
LOOP AT gt_final INTO gs_final WHERE mark = ‘X’.
UPDATE ZDOC_NUMBER SET fin_status = so_stat-low WHERE belnr = gs_final-belnr AND gjahr = gs_final-gjahr.
IF sy-subrc = 0.
COMMIT WORK.
lv_flag = ‘X’.
ENDIF.
ENDLOOP.
IF lv_flag IS NOT INITIAL.
CONCATENATE ‘Document’ gs_final-belnr ‘Updated Successfully’ INTO lv_msg SEPARATED BY space.
MESSAGE lv_msg TYPE ‘S’ .
CLEAR: lv_flag, gs_final, lv_msg.
ENDIF.
ENDFORM.
*&———————————————————————*
*& Module UPDATE_MARK_FIELD INPUT
*&———————————————————————*
MODULE update_mark_field INPUT.
IF gs_final-mark = ‘X’.
MODIFY gt_final FROM gs_final INDEX tc_data-current_line.
ENDIF.
ENDMODULE.
Step 4. Click on the below-highlighted Icon and create a screen with the 9001 number. Right-click the on-screen icon as shown below and create it.
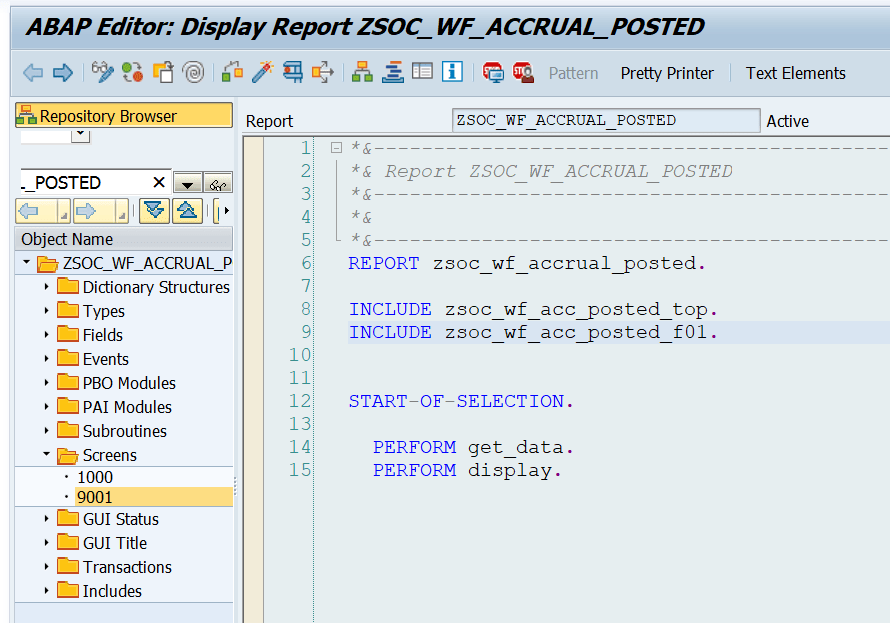
Step 5. After creating screen 9001, you have to design the layout of the screen as per the below snapshot.
On this screen, I have created five elements as mentioned below.
- Text Field – > To display Header Text – You can type anything as per your requirement.
- Input Field -> To show the No. of records which will display on the Table Control.
- Two buttons –> Convert Button & Back
Convert Button -> When you click on this button Status column will be changed from P to C and vice versa. It will be updated in a database table.
Back Button -> After clicking on this button, it will go one step back or it will call the selection screen to re-input data.
- Tab Control -> To display the list of data records: You have to create table control using the help of the Table Control wizard, which is very easy and simple. When you are creating Table Control, it will ask you for an internal table and work area. For the Internal table, you have to put GT_FINAL and for Work Area, you have to put GS_FINAL and complete the creation of Table control. Save and Activate it.
Note: Put the name of the Table control as TC_DATA and every name of the elements must be the same as I mentioned otherwise it will through an error message. So please be careful.

Step 6. Assign the name of both buttons (Convert Document and Back) as well as the input field mentioned below.
Convert Button -> BTN_CONVERT

Back Button -> BTN_BACK

Input Field -> IN_TOT_REC

Step 7. Check the error and fix it (if occurs any error). Save and Activate it.
Step 8. Using Tcode SE93 create a Transaction code.