TMG Events in SAP ABAP Step by Step Process
SAP ABAP Interview Questions – Real Time
Free Video Course for SAP ABAP
Here is the step by step process to fetch some value of the table’s field automatically using very useful features of ABAP – TMG Events in SAP ABAP.
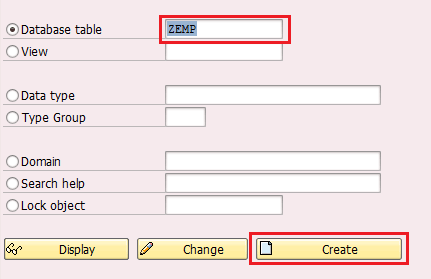
Step 1: Execute the Transaction Code SE11 in SAP Command bar and type the table name. Then click on the “Create” button.
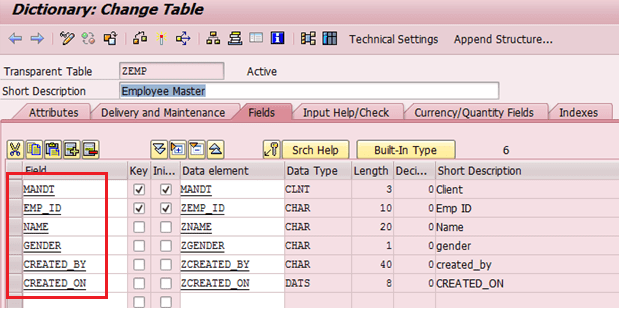
Step 2: Create all the required fields for table ZEMP as per the below screen.
Step 3: Go to the tab “Delivery and Maintenance” and fill in the value as per the below screen.

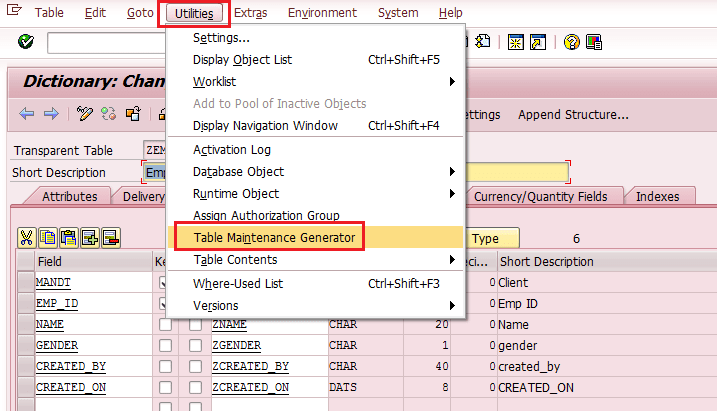
Step 4: Now, Go to the “Utilities” menu and click on “Table Maintenance Generator”.
Step 5: The following screen will be displayed.
Enter the details for the required fields as per below screen.
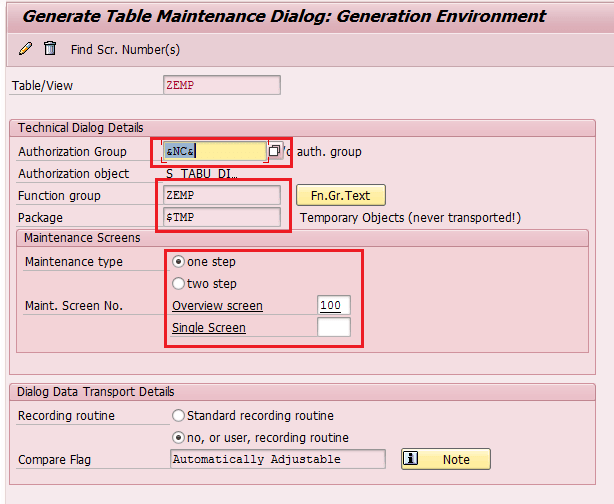
Function Group:- It is the name to which the generated maintenance modules will belong to.
Generally, the Function Group name can be the same as the table name.
Authorization Group:- If you want to maintain the table by a particular group of people, then the Authorization group needs to be filled otherwise fill it as NC. You can maintain the authorization group using transaction Code SU21.
Propose Screen Numbers and click on Save button,
Package Name:-You have to provide the package name.
There are two different maintenance screen types
One Step
Two Step
One Step
In “One step” we will have only an overview screen for TMG.
And you will able to see and maintain only through the overview screen.
Two Step
Here, we will have two screens. Overview screen and Single screen.
The overview screen will contain only key fields and the single screen will contain all the other fields means without key fields.
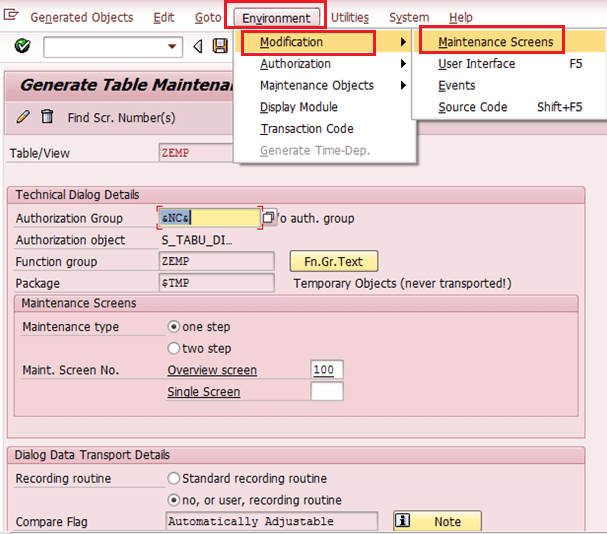
Step 6: After setting these things you have to change the header text of the table maintenance generator otherwise header text will not show and it will display only the ‘+’ sign when you create an entry into the table.
Please see the screen below.
Go to the Menu “Environment” then select “Modification” and then click on “Maintenance Screen”.
Select the line on the next screen and click on the continue button.
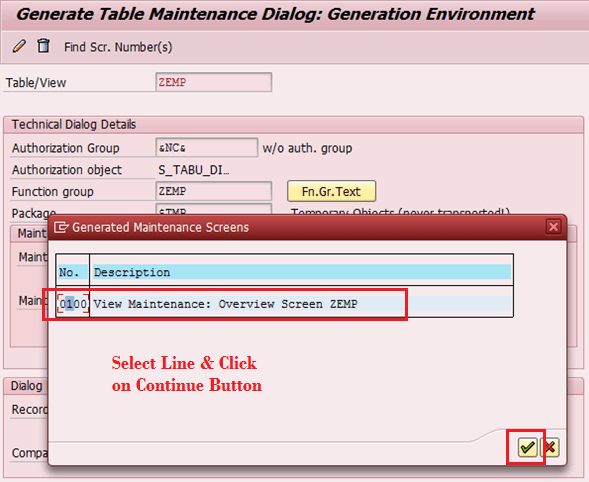
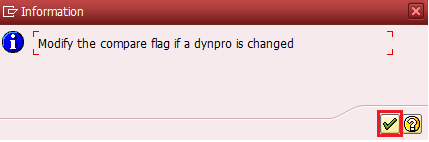
Now Click on the Continue button.
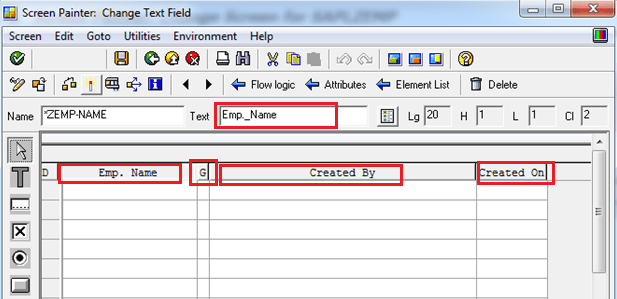
On the next screen, click on the “Layout” icon to change the table’s Header text.
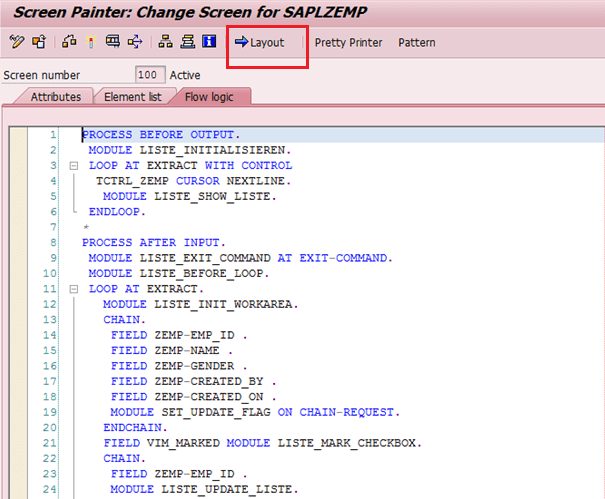
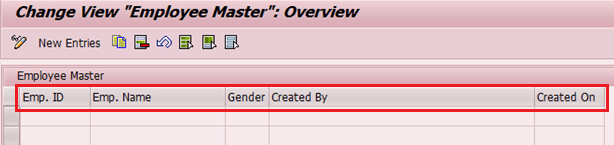
You can see that text has been changed as shown below snapshot.
Now, If you execute this, the screen will be displayed like this.
Step 7: In this step, we will try to populate values of fields “Created by and Created on” automatically.
You have to provid only Emp. ID, Emp. Name and Gender the other two fields should become automatic.
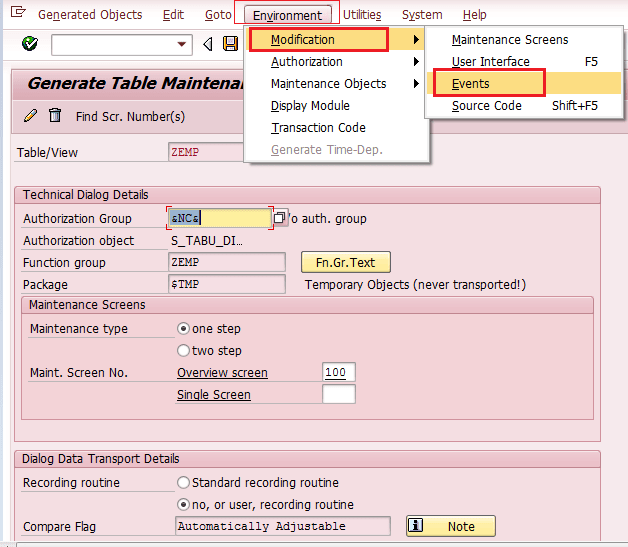
For this, we will go to the menu “Environment” then select “Modification” and click on “Events”.
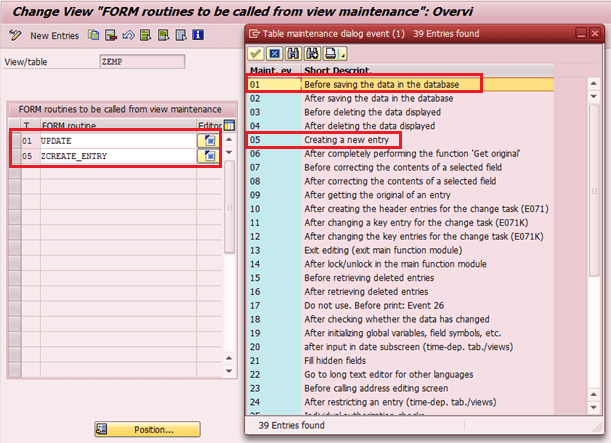
Step 8: Create a FORM routine to write the code for updating the table. Here, I have selected “01” for
Capture the changes before saving and “05” for creating a new entry.
(Table Maintenance Generator) TMG Events in SAP ABAP
The value to be displayed on the maintenance screen for any field can also be altered for every new entry in the table as per the requirement.
For this reason, Event needs to be chosen which performs the action by the user. In this case event “01″ was used to update the data before saving and “05 creating a new entry”.
Events that are available in Table Maintenance Generator (TMG Events in SAP ABAP).
01 Before saving the data in the database
02 After saving the data in the database
03 Before deleting the data displayed
04 After deleting the data displayed
05 Creating a new entry
06 After completely performing the function ‘Get original’
07 Before correcting the contents of a selected field
08 After correcting the contents of a selected field
09 After getting the original of an entry
10 After creating the header entries for the change task (E071)
11 After changing a key entry for the change task (E071K)
12 After changing the key entries for the change task (E071K)
13 Exit editing (exit main function module)
14 After lock/unlock in the main function module
15 Before retrieving deleted entries
16 After retrieving deleted entries
17 Do not use. Before print: Event 26
18 After checking whether the data has changed
19 After initializing global variables, field symbols, etc.
20 after input in date sub screen (time-dep. tab. /views)
21 Fill hidden fields
22 Go to long text maintenance for other languages
23 Before calling address maintenance screen
24 After restricting an entry (time-dep. tab./views)
25 Individual authorization checks
26 Before creating a list
27 After creation or copying a GUID (not a key field)
28 After entering a date restriction for time-dep. views
AA Instead of the standard data read routine
AB Instead of the standard database change routine
AC Instead of the standard ‘Get original’ routine
AD Instead of the standard RO field read routine
AE Instead of standard positioning coding
AF Instead of reading texts in other languages
AG Instead of ‘Get original’ for texts in other languages
AH Instead of DB change for texts in other languages
ST GUI menu main program name
AI Internal use only
Step 9: Go to the editor to write the code by using the Editor icon as shown below.
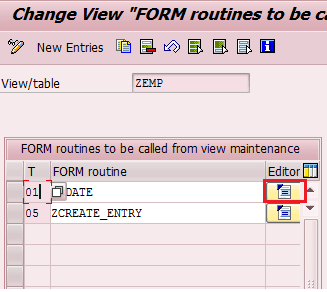
Click on Editor Icon to do the code for both the FORM as shown below screen.
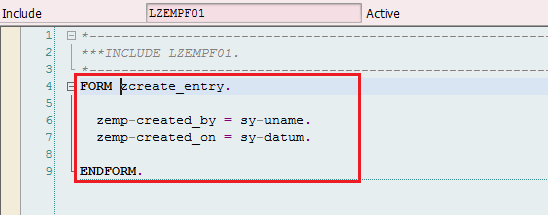
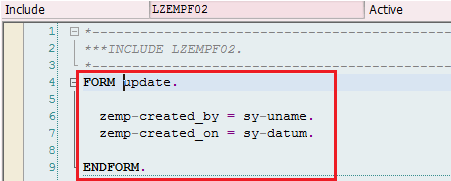
Activate both subroutines.
Step 10: Next, we will create and update the table data to test the Update and Create events.
Go to Table Maintenance Generator using (Transaction Code SM30 ) and Click on maintain button as shown below.

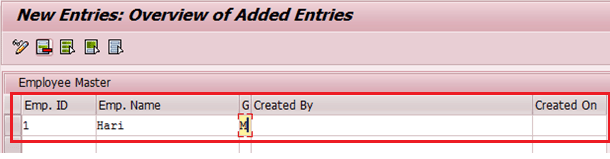
Step 11: Click on the “New Entries” Icon.
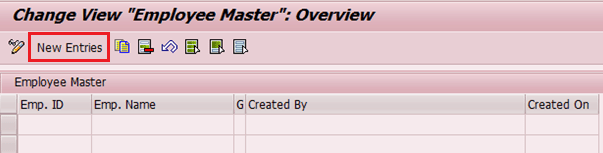
Fill the Emp. ID, Emp. Name and Gender and press Enter button. The remaining two fields (Created by ad created on) will be populated automatically.
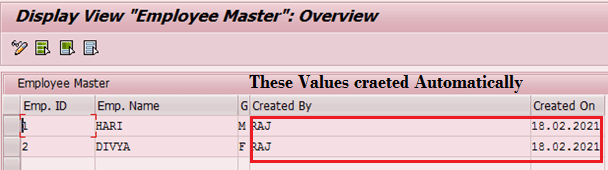
Both the Columns “Created by” and “Created on” populated automatically of table ZEMP as shown below.
Thanks for reading this article for TMG Events in SAP ABAP.
Summary:
Following the above-mentioned steps are which we are able to see the table create and update logs for a custom table “ZEMP”.
It contains the logs of who has created the entry and when.
Using this feature of SAP ABAP we can do many operations on the Database table to capture logs as well as set the validation.
This is a very helpful feature of SAP ABAP and this is done by technical guys ABAPers.
SAP MM – Material Management – Best Exercises