Enhancement – SAP BADI to add a Custom Tab in Header for Standard Tcodes – VA01, VA02, VA03 (Sales Order)
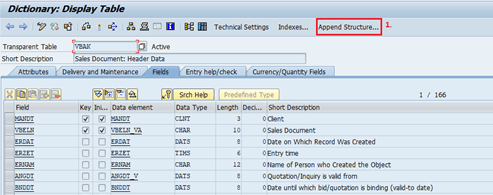
Step 1: First append the structure of fields you want to display and save values in Table VBAK. Click on Append Structure.
SAP ABAP Interview Questions – Real Time
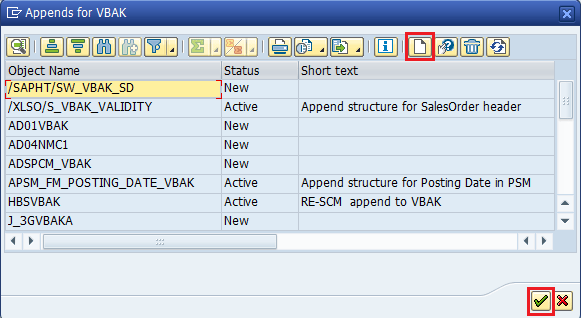
Step 2: Create an Append Structure by clicking on the ‘Create’ button.
Step 3: Create the fields which you want to add to the standard table, here I am taking only 2 fields as shown below. Save and Activate the structure. (Note: Naming of the field should start with ‘ZZ’).

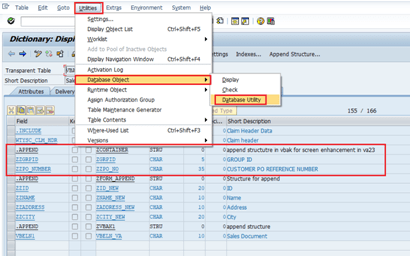
Step 4: Now you will see your fields appended in the table VBAK. Now go to Utilities -> Database Object -> Database Utility.
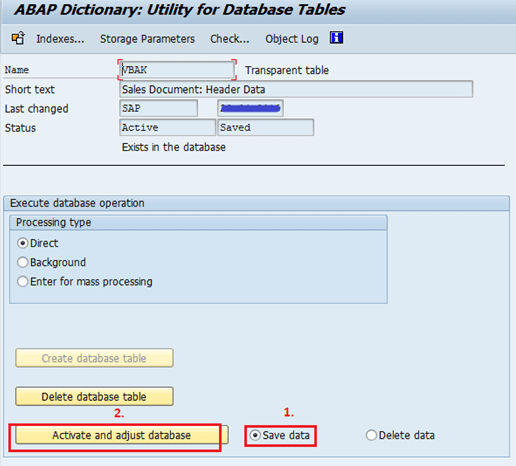
Step 5: Now adjust the table. Make sure to select the ‘Save Data’ Radio button before pressing the Activate and Adjust” button.
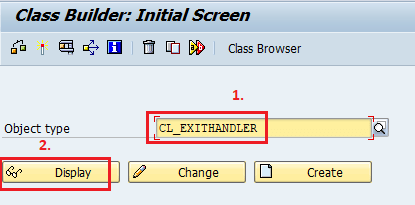
Step 6: Now find the BADI used in the Tcode – VA01/02/03, for that open Tcode – SE24 and write the name of class “CL_EXITHANDLER” and open in display mode.
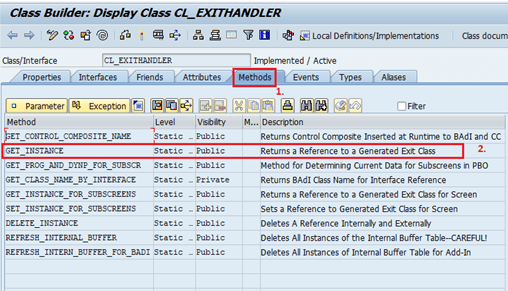
Step 7: Now go to the Methods tab and open the GET_INSTANCE method by double clicking on it.
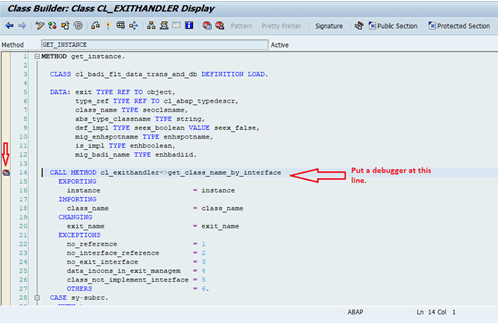
Step 8: Put a debugger at line “CALL METHOD cl_exithandler=>get_class_name_by_interface”. And execute the standard tcode for BADI & you will get all Badi one by one for this tcode.
BADI IMPLEMENTATION
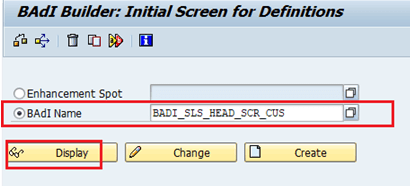
Step 9: Now go to SE18 Tcode & Enter the BADI name and click display.
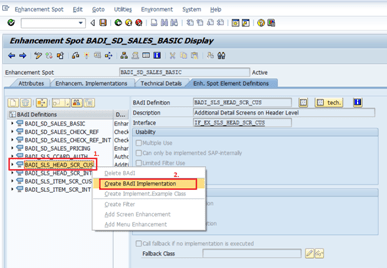
Step 10: Select BADI_SLS_HEAD_SCR_CUS and right-click on it. Click on Create Implementation.
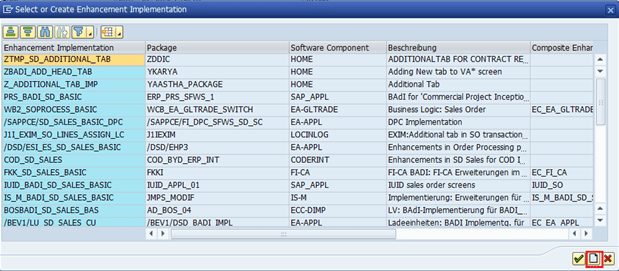
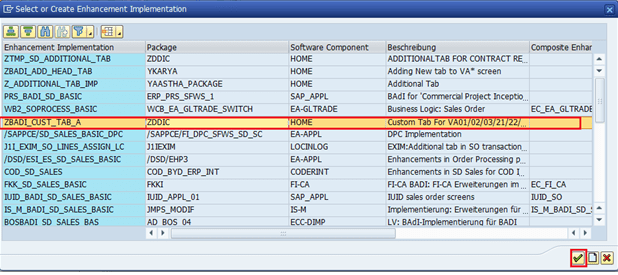
Step 11: A new window will open to select the Enhancement already created before, but we will create a new one. Click on the Create button.
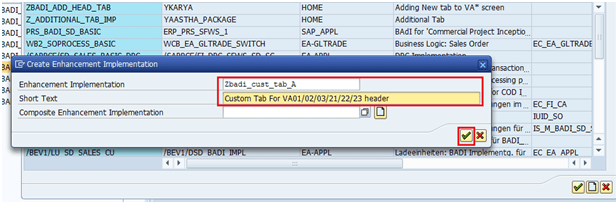
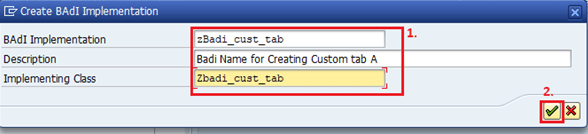
Step 12: Enter the name of Enhancement and the description as shown below.
Step 13: Now select the Enhancement you created before.
Step 14: Now enter the name of the BADI with the description and implementing class.
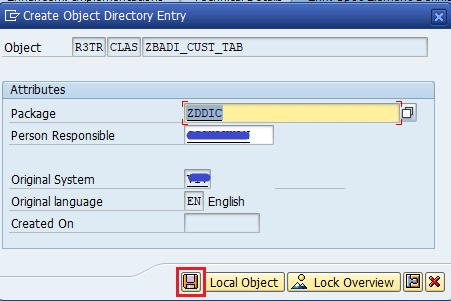
Step 15: Now provide the package name and TR request.

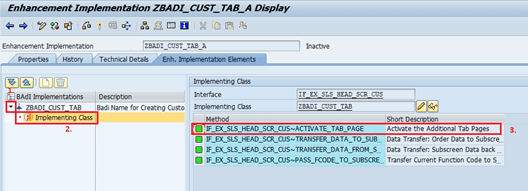
Step 16: Click on the drop-down button beside the BADI name and double-click on the Implementing class. Double-click on the Methods shown next to it.
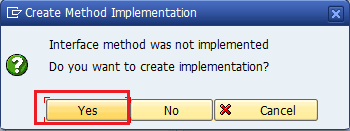
Step 17: It will ask for the confirmation to create click on Yes.
Step 18: Now inside the Method “IF_EX_SLS_HEAD_SCR_CUS~ACTIVATE_TAB _PAGE” enter the code shown below and activate it.

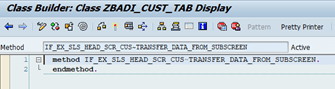
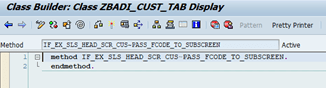
Step 19: Now for other methods do the same as shown below respectively and activate.
METHOD: ” IF_EX_SLS_HEAD_SCR_CUS~TRANSFER_DATA_TO_SUBSCREEN”.

METHOD: ” IF_EX_SLS_HEAD_SCR_CUS~TRANSFER_DATA_FROM_SUBSCREEN”.
METHOD: ” IF_EX_SLS_HEAD_SCR_CUS~PASS_FCODE_TO_SUBSCREEN”.
Activate the whole BADI and exit.
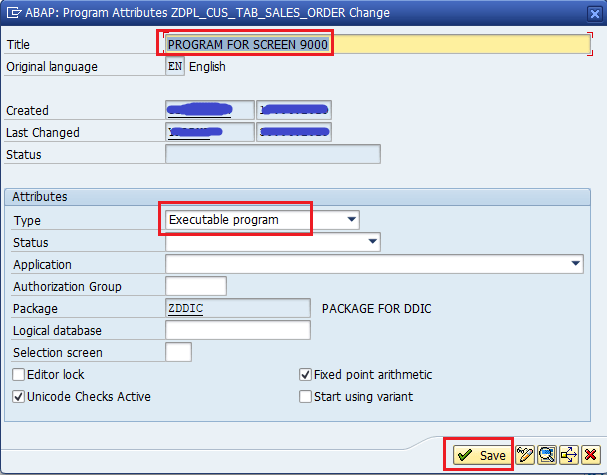
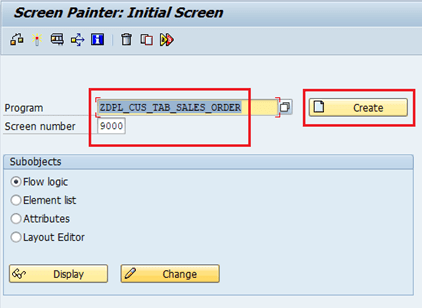
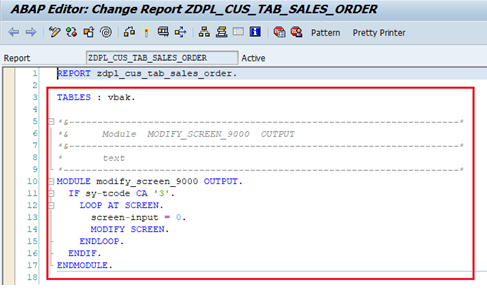
Step 20: Now go to SE38 and create a program with the name “ZDPL_CUS_TAB_SALES_ORDER” as shown below.
Step 21: Now go to SE51 to create a screen. Enter the name of the Program and the screen number as shown below. Click on Create button.
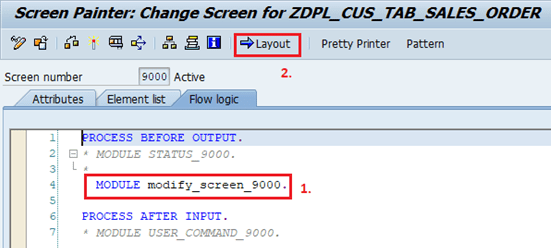
Step 22: Create a module “MODIFY_SCREEN_9000” under PBO and then Click on the LAYOUT button.
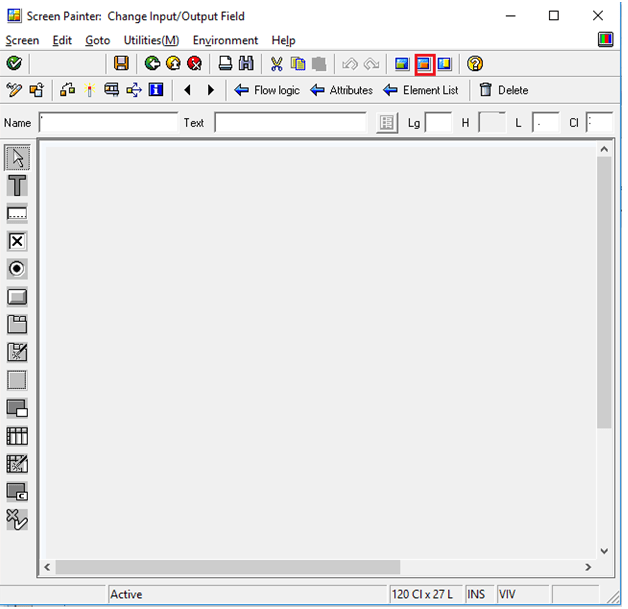
Step 23: Create the screen elements by clicking on the “Get from Dictionary” button as shown below.
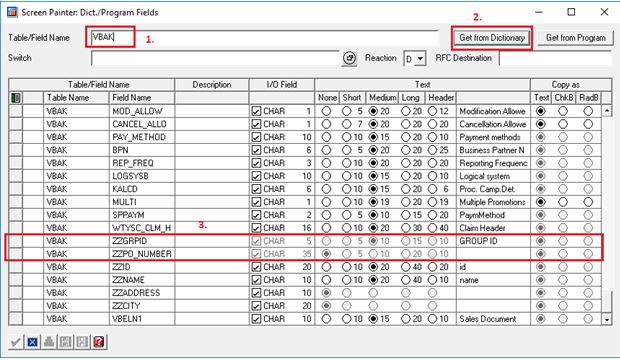
Step 24: Enter the Name of the table Click on Get from Dictionary and select the fields you added to the table.
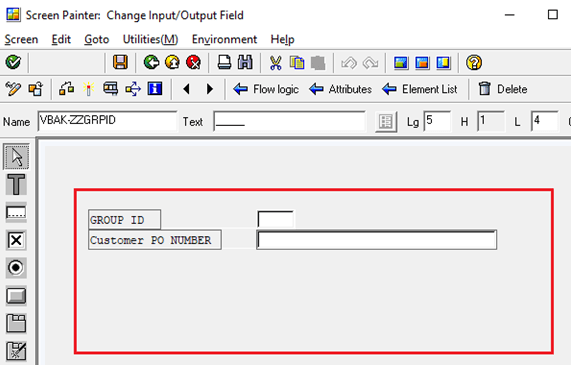
Step 25: Drag and release the elements on the screen, as shown below. Save and Activate the screen.
Step 26: Now add the code inside the module “MODIFY_SCREEN_9000” as shown below.
Save and activate the program.
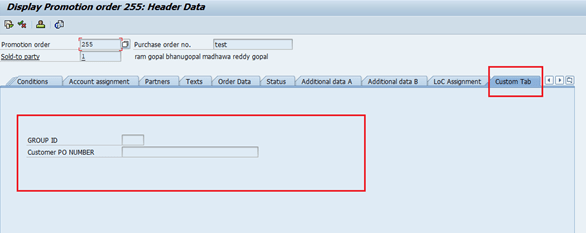
Now run the Tcode VA01, VA02, and VA03 and check for the custom tab.
OUTPUT