Create a Module Pool Program using Table Control
Displaying Multiple line items
SAP ABAP Interview Questions – Real Time
Step 1: Go to SE80, select “Program” from the dropdown list and enter the name of the Module Pool Programming.
Step 2: A pop-up will rise and ask you to create it. Click on Yes.
Step 3: Another Pop will come out to ask you to enter the name of the module pool program. Click on the “Create with TOP Include” checkbox and click on the tick button.
Step 4: Now enter the name of the TOP Include and continue saving it as a module pool program.
Provide Package name or TR details. Or Save it in a Local Package.
Step 5: Now double click on “Include ********_TOP“ on the screen, create it and write the following code.
Step 6: Now activate it.
Step 7: Now right-click on the Program name and create a screen.
Step 8: Give Screen Number “100” and click on Tick.
Step 9: Give a short description and click on Layout.
Step 10: Now a screen painter will open. Click on “Dictionary/Program Fields Window”.
Step 11: Enter the name of the Work Area you created in TOP Include and click on “Get from Program” and select the fields you want to display.
Step 12: Now drag and drop it on the screen painter.
Step 13: Now select “Text tool” from the side panel and drop it next to the input tab and write the text which you want to display for the input field.
Step 14: Do the same for all the input fields as shown below.
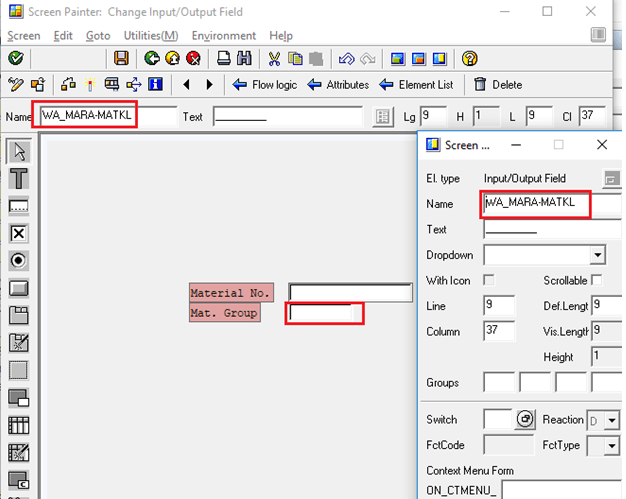
Step 15: Now double click on the input box and pass the parameter name as shown below.
Step 16: Now select the Text tool to add some text to the screen, such as headings.
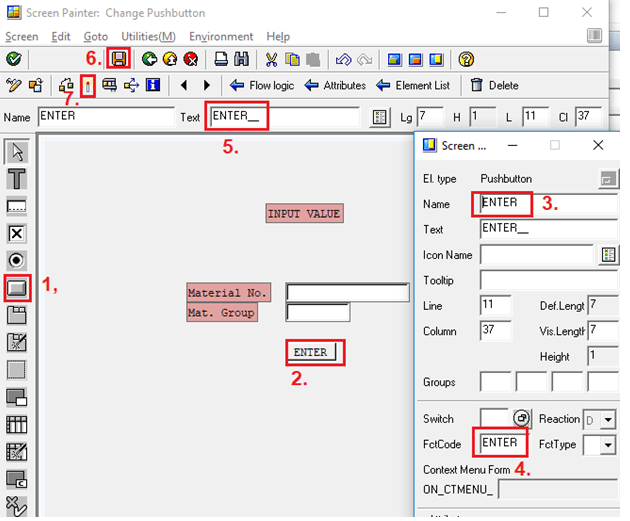
Step 17: Now create a button by clicking on the “Push Button” on the left ToolBox and place it on the screen wherever you want. Now double click on the button, and a pop-up will come out, enter the name of the button there and mention the Function Code “Fct Code” in that as shown below. Now save and activate the screen.
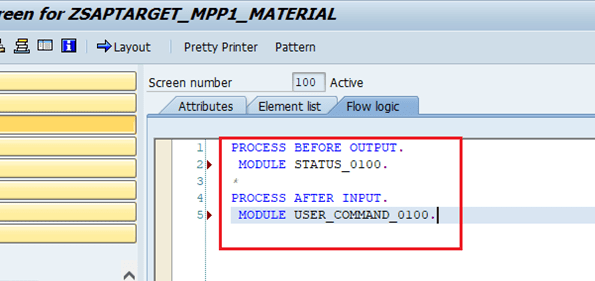
Step 18: Now go to the “Flow Logic” tab and uncomment the PBO and PAI modules respectively.
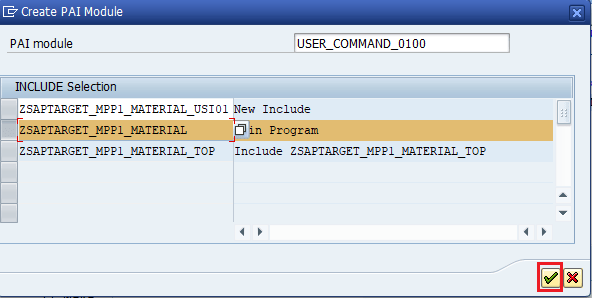
Step 19: Then double click on Module USER_COMMAND_0100 and create it in the Main Program, for now as shown below.
Step 20: Now inside “MODULE user_command_0100 INPUT” write down the code shown below. Then save and activate it.
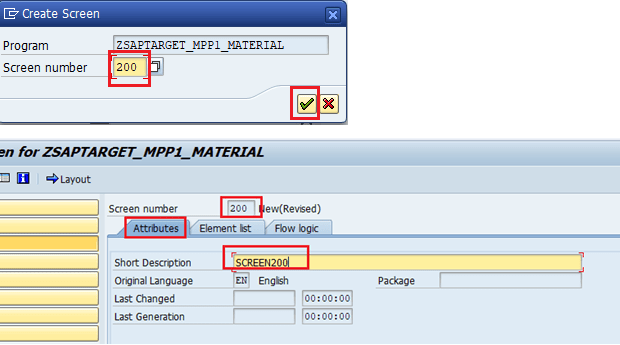
Step 21: Now create another screen by right-clicking on the program name as shown previously. Give screen number “200” and provide a short description as below.
Step 22: Now click on the “Layout” button and open the screen painter as shown previously for “screen 100”.
Step 23: Now a screen painter will open. Click on “Table Control Wizard”.
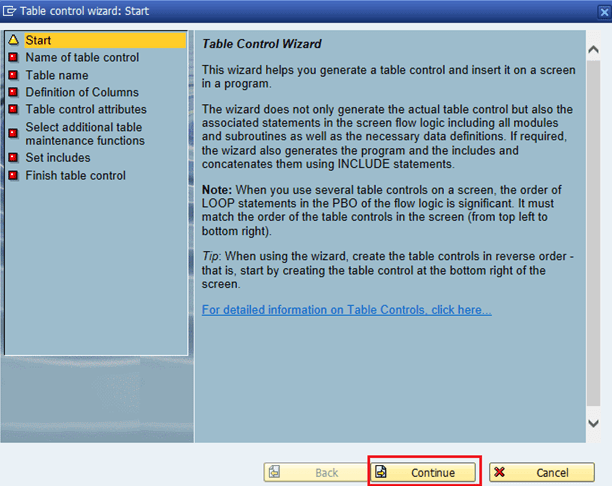
Step 24: A Wizard box will open as shown below. Click on the Continue button.
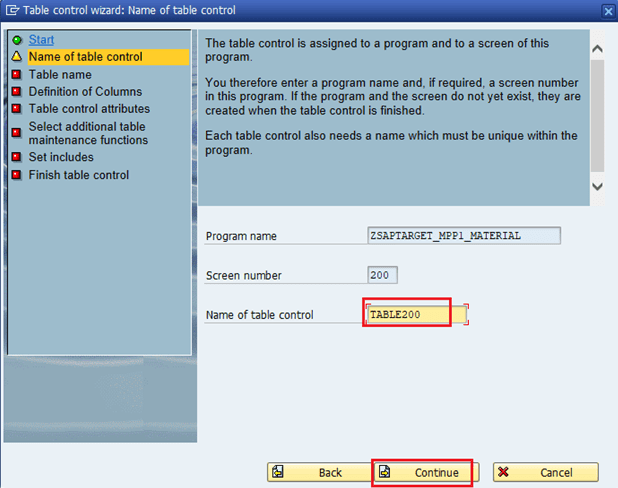
Step 25: Now write the name of the Table Control whatever you want, here we have written “TABLE200” and click on the CONTINUE button.
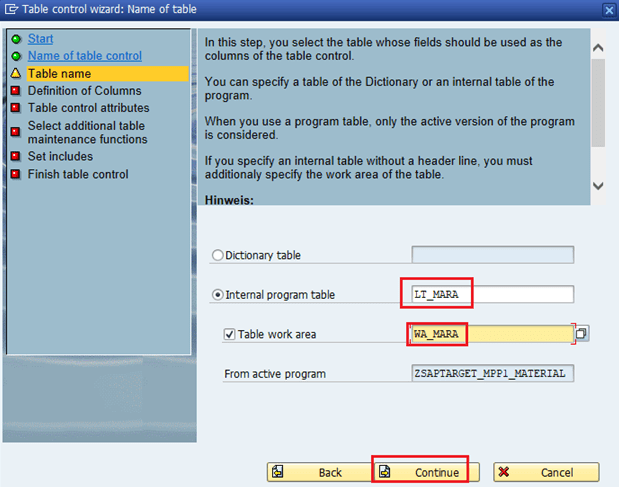
Step 26: Now on the next step give the name of the Internal table and Work area we defined in the TOP Include and press continue.
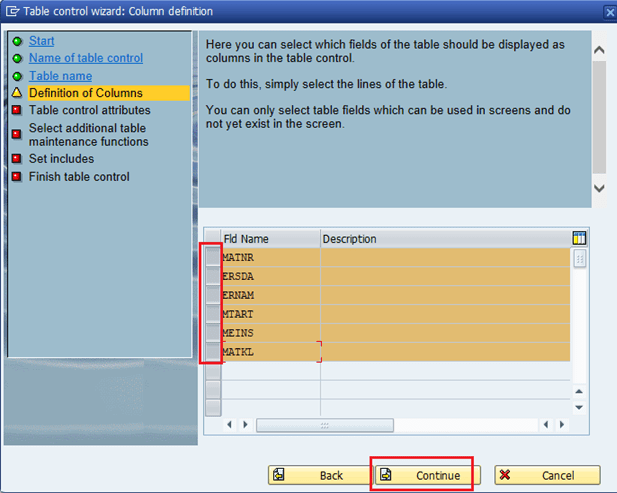
Step 27: Now choose the fields you want to display in the table and click on the Continue button.
Step 28: Now in the next step choose the attributes of the table. In this case, choose “Input/Output attributes” as Output Only and tick the “with column headers”. Click on the Continue button.
Step 29: In the next step just click on the “Continue” button.
Step 30: In the next step set includes data definition and PBO and PAI and subprograms which are provided by default or you can change the name of them.
After that click on the Continue button.
Step 31: In the last step just click on the Complete button.
Step 32: On-screen painter you will have a table structure. Now create a “back button” on the screen using Pushbutton from the toolset.
Step 33: Now save and activate the screen and go to “Flow Logic” and uncomment Modules under PBO and PAI sections.
Step 34: Now double click on MODULE USER_COMMAND_0200 and create it and save it in the main program for now.
Step 35: Now write this code inside the MODULE user_command_0200 INPUT.
Step 36: Now right-click on the program name and create-> Transaction.
Step 37: Enter the name of the Transaction code and a short description. Select the radio button “Program and screen (Dialog Transaction)”.
Step 38: Now enter the screen number of that screen which you want to see first when you run your transaction code, here in our case we are adding screen number 100.
Step 39: Now save and activate the whole program by right-clicking on the program name and clicking on the “Activate button”.
Step 40: Now run the transaction code in the transaction box.
OUTPUT
Step 1: Input the Value & Press Enter button.
The output will be displayed below.


