How to Create a Smartform to display Form HEADER Information with a LOGO – Creating Logo in Smartform
SAP ABAP Interview Questions – Real Time
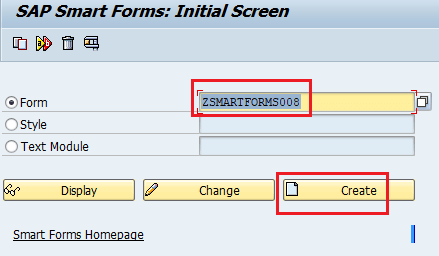
Step 1: Go to t-code “SMARTFORMS” and enter the form name and click on Create.
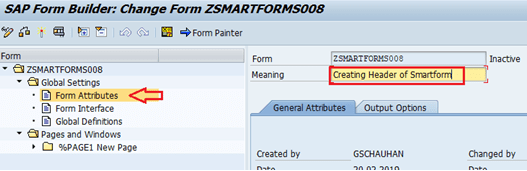
Step 2: In Form Attributes, enter the description of the form.
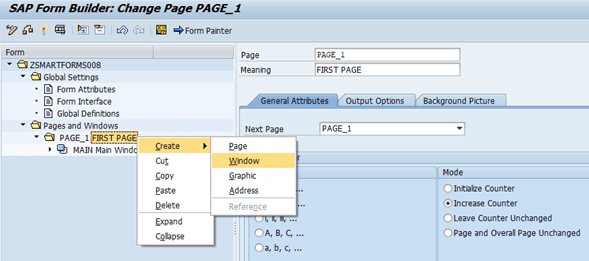
Step 3: Double click on Page and change the name of the page. Now Right click on PAGE_1: Create -> Window.
Step 4: Double click on the window and change the name to “HEADER” and give the meaning also.
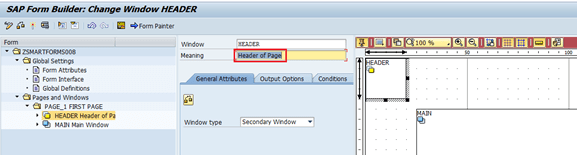
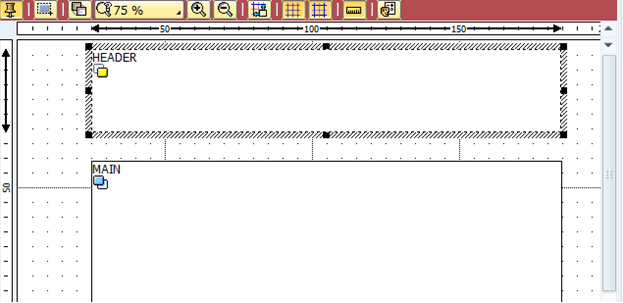
Step 5: Click on Form Painter and adjust the “HEADER” Window according to your need.
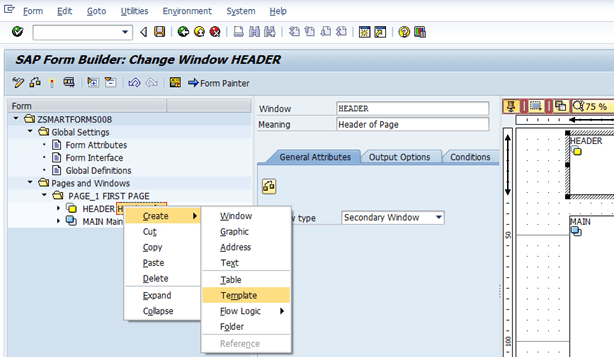
Step 6: Double click on Header Window and Right click on it: Create -> Template.
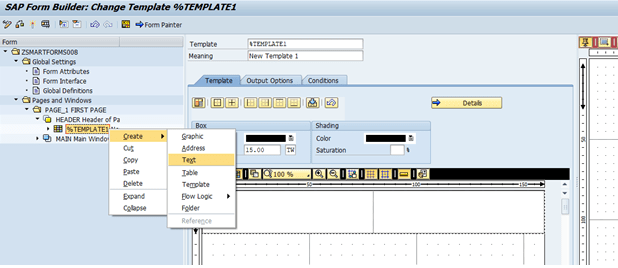
Step 7: Now double click on Template and right-click on it: Create -> Text.
Step 8: Now change the name of the text.
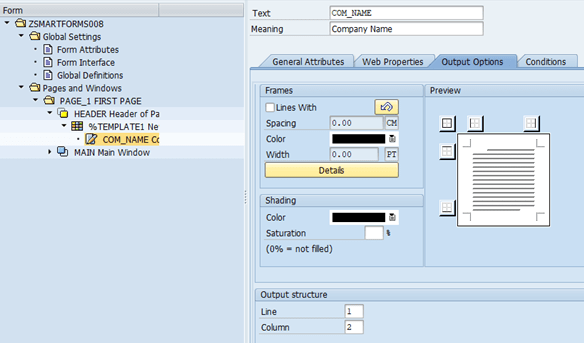
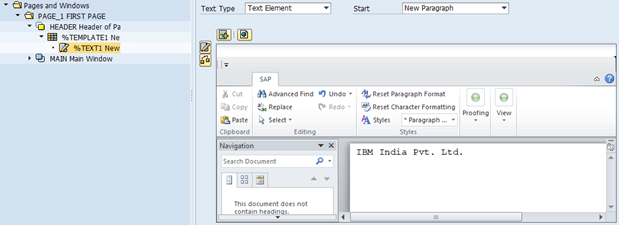
Step 9: Double click on the text and enter the text in it. (This text will be displayed in the header window).
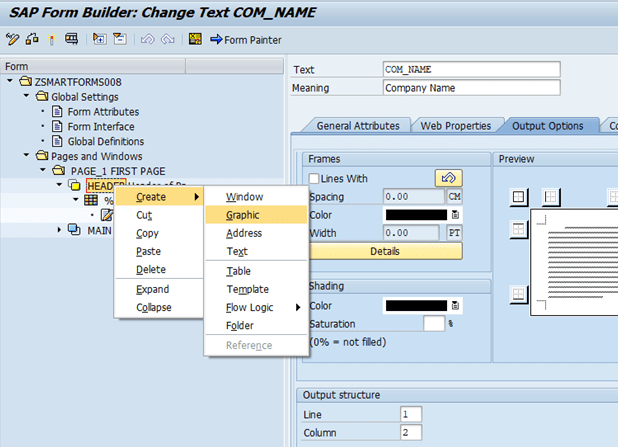
Step 10: Double click on the “HEADER” Window and right-click on it: Create -> Graphic.
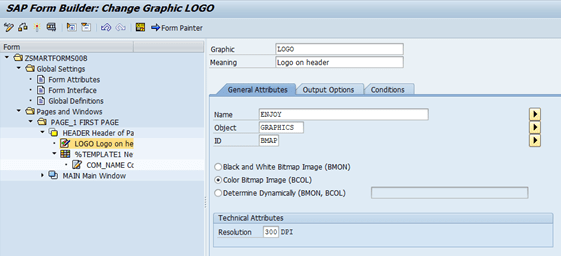
Step 11: Double click on it and change the name of the graphic and provide a meaningful description. In the “General Attribute” tab choose the name of the logo and give Resolution in Technical Attributes.
Step 12: Double click on Main Window and Create -> Table. (Go to zsmartform002)

Step 13: Save and activate the Smartform.

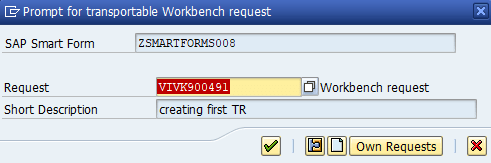
Step 14: Enter TR & Click on the OK button.
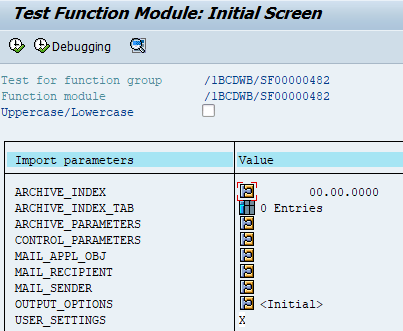
Step 15: Click on Test ![]() button .
button .

Step 15: Another screen will open and click on Execute ![]() button.
button.
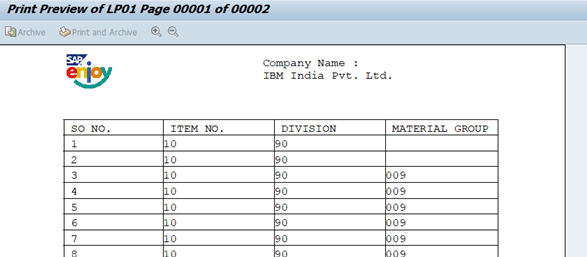
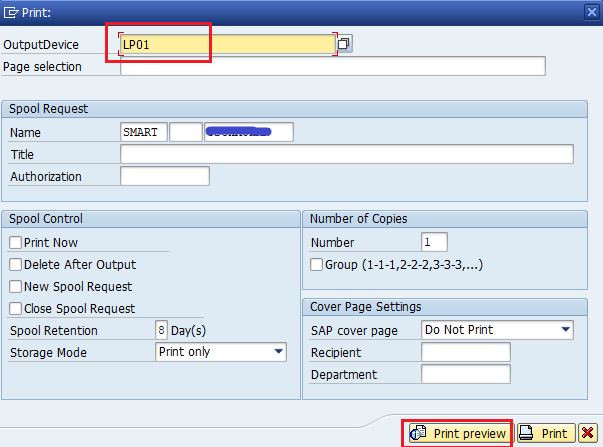
Step 16: A new pop-up will display, give the Output Device name and click on the Print Preview button.
OUTPUT