Creating an SAP LOCK OBJECT Using Read Mode
SAP ABAP Interview Questions – Real Time
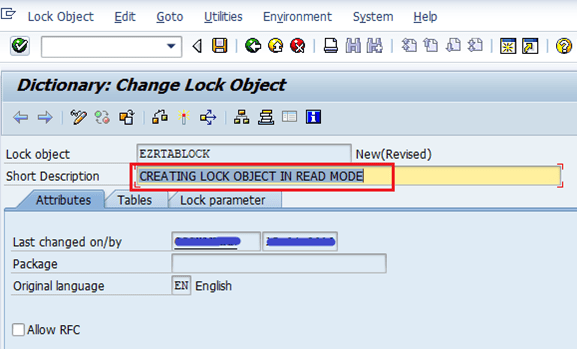
Here we are creating a READ LOCK object for a custom database table “EZRTABLOCK”.
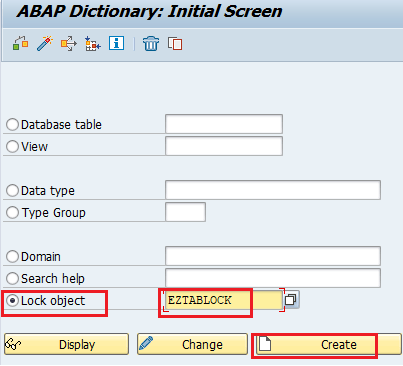
Step 1: Go to SE11, provide lock object name starting with the prefix “EZ<name>”, click on create.

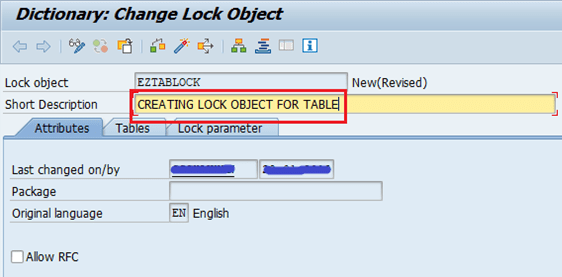
Step 2: Provide a short description, and select the tables tab.
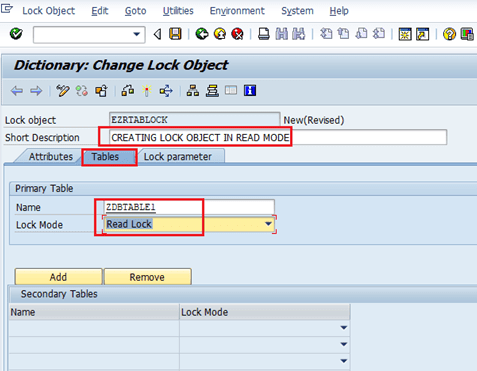
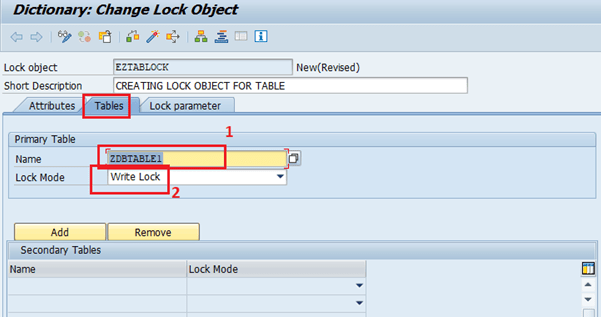
Step 3: Provide the table name and lock mode.
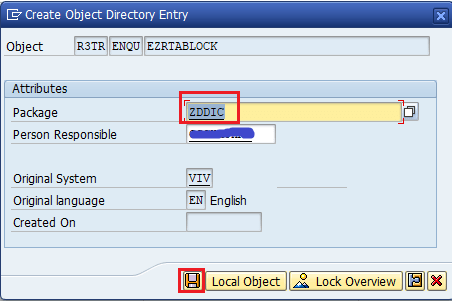
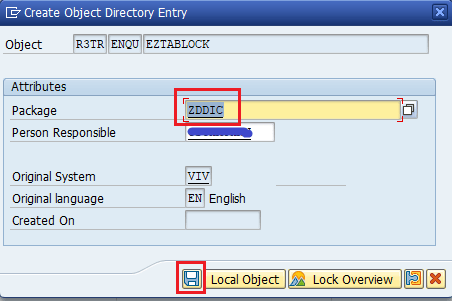
Step 4: Now click on save![]() button and provide a package name.
button and provide a package name.
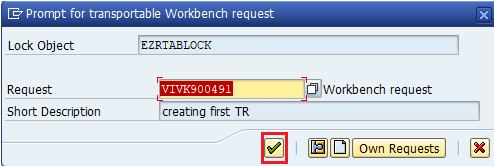
Step 5: Enter the TR number & click on the “OK” button.
Step 6: Now activate it by clicking on activate![]() button. Successfully message will be displayed at the bottom of your screen, which means your Lock object is created.
button. Successfully message will be displayed at the bottom of your screen, which means your Lock object is created.
![]()
NOTE: Whenever a lock object is activated, two function modules are automatically created & its naming prefix will be as ENQUEUE_EZ<name> and DEQUEUE_EZ<name>.
LOCK OBJECT Using WRITE Mode:
Here we are creating a WRITE LOCK object for a custom database table name ZDBTABLE1.
Step 1: Go to SE11, provide a lock object name starting with the prefix “EZ<name>”, and click on create.
Step 2: Provide a short description.
Step 3: Select the “Tables” tab & Provide the table name and lock mode.
Step 4: Now click on Save![]() button & provide the package details.
button & provide the package details.
Step 5: Click on Save![]() button. Enter TR Number on next screen & Click OK.
button. Enter TR Number on next screen & Click OK.

Step 5: Now activate it by pressing activate![]() button .
button .
NOTE: Whenever a lock object is activated, two function modules are created automatically.
Name will be ENQUEUE_EZ<lock_obj_name> and DEQUEUE_EZ<lock_obj_name>
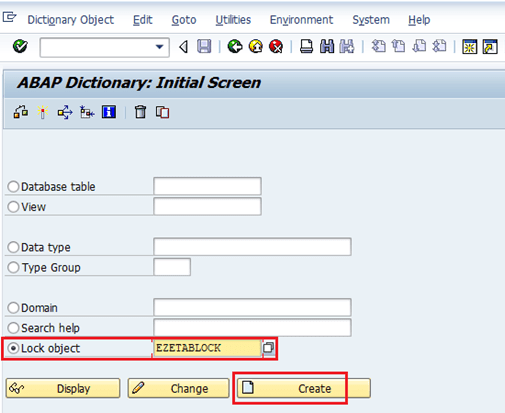
LOCK OBJECT Using Exclusive Mode:
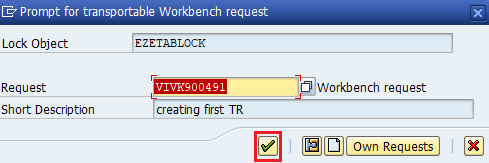
Here we are creating an EXCLUSIVE LOCK object for a custom database table EZETABLOCK.
Step 1: Go to SE11, provide a lock object name starting with the prefix “EZ<name>”, and click on create.
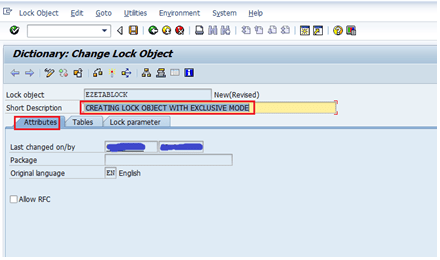
Step 2: Provide a short description.
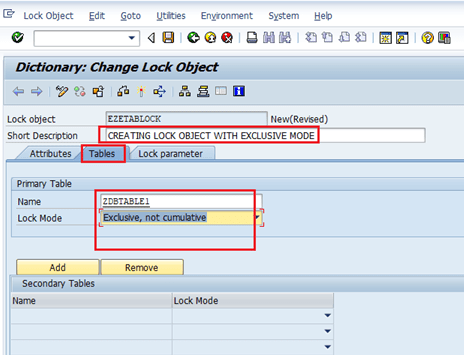
Step 3: Provide the table name in the table tab and lock mode = “Exclusive, not cumulative”.
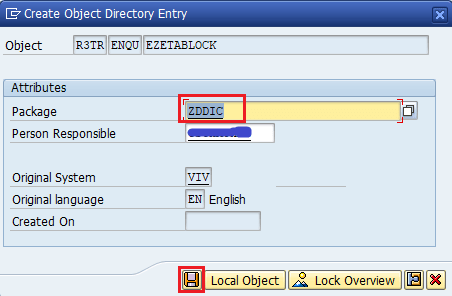
Step 4: Now click on the save button and provide the package name and click the save ![]() button.
button.
Step 5: Enter the TR number & click on the OK button.
Step 5: Now activate it by clicking on activate![]() button. Below message will be displayed.
button. Below message will be displayed.
![]()
Whenever a lock object is created, two function modules will be created automatically with the name ENQUEUE_EZ<name> and DEQUEUE_EZ<name>.